The key to growing a healthy tree begins with proper planting procedures. Choosing the right tree for the right spot, is perhaps the most important factor that will determine whether or not the tree will survive and thrive. Watering is a critical component to the health of your tree, be sure to talk to our staff about watering when you are discussing tree possibilities. Many of the nutrients trees need are things they cannot consume directly through their roots, the activity of soil biota make nutrients within organic matter available overtime.
Using products like Root Rescue and Soil Activator allow for essential nutrients to be taken up by the roots, promoting optimal health of the tree.
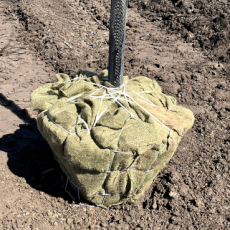
- 1. Preparing the Area- Skim off the turf of an area about 4’ in diameter where you are going to plant your tree
- 2. Digging the Hole – The size of the hole depends on the size of the root ball. Most of our large trees require a hole about 3 ½’ wide and 2’ deep. An easy way to measure and see if you have dug to the appropriate depth is by laying a shovel over the hole, then placing another shovel upright in the hole, and using that measurement against the size of the root ball. Digging the hole is easiest when you have the tree there with you.
The importance of planting a tree at the correct depth cannot be over emphasized. Now that the hole is the correct size, scruff up the sides of it a bit – this makes it easier for the roots to penetrate the surrounding soil.
- 3. Putting the Tree in the Hole-Hopefully your tree isn’t too far away. Carefully and gently roll the tree into the hole. Backfill with a few scoops of soil so that the tree is standing relatively straight, and make sure that it is situated the way you want it. This is your only chance to change its position/orientation!!!
- 4. Backfilling- At this point, only backfill about halfway. Backfill around the tree with the previous existing soil combined with a few shovelfuls of peat moss, and a few handfuls of Bone meal.** An easy way to mix these is by depositing a few shovelfuls of the peat moss on the mounds of soil that resulted from digging the hole, and shaking over a few handfuls of Bone meal. This way, as you return that existing soil as backfill, all three components kind of mix together on their own.**
Once you have backfilled about halfway, and stomped in around the root ball, have another look at the tree. Make sure that it is nice and straight.
At this point, cut all the ropes that are looped through the wire basket and around the tree–get them out of there. Now there are 5 wire loops that kind of stick out above the rest, bend these loops back into the hole–essentially getting them below grade. Stepping on them works well to do this. There is burlap around the trunk of the tree and covering the root ball–untie it from around the trunk and pull it back so that the top of the root ball is totally exposed. Cut off this portion of the burlap.
Continue to backfill and stomp around the root ball until you are level with the top of it. There is no need to pile soil on top of the root ball, as that would bury it too deeply. KEEP STOMPING to eliminate all large pockets of air. If your root ball is slightly above grade, simply create a gradual slope away from the edge of the root ball to level ground.
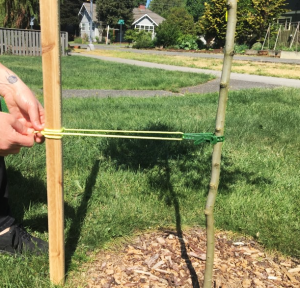
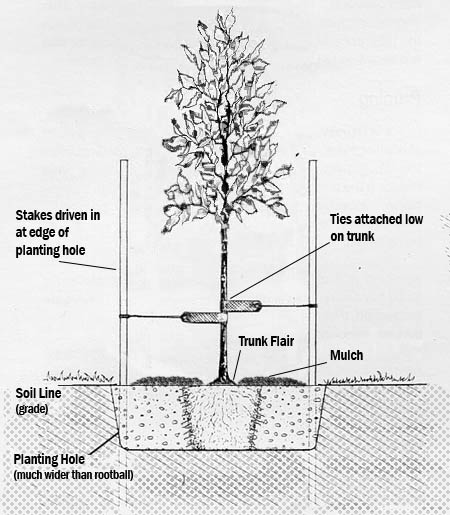
- 5. Staking- Use wooden or metal stakes that are at least 6’ tall, pound them into the ground about a foot deep and about 12 to 16 inches away from the trunk, outside of the root ball/wire basket. Make sure the stakes are securely in place, the first is placed upwind from the prevailing wind direction and the second, opposite the first stake. Stakes should be attached to the tree with broad, smooth, flexible ties(biodegradable is preferred, e.g. jute twine)that allow trunk movement but stabilize the root ball. Position the ties well below the first set of branches, attach the ties as low as is effective for stabilizing the root ball. Ties and stakes should generally be removed after one year of growth.
- 6. Mulching – Mulching around the base of the tree is an important step. Mulch to a depth of about 3”, and a diameter of about 3’. Be sure that the mulch is kept away from the trunk by an inch or two – piling mulch against the trunk will cause trunk rot and encourage rodent damage.
- 7. Trunk Protection- Tree guards or wraps may be required if there is a threat of damage from line trimmers, rodents, deer, rabbits or sunscald. Winter protection may be needed for evergreens or trees in windy areas, speak with our staff for great advice.
BEST TIME OF YEAR TO PLANT A LARGE CALLIPER TREE
In climates such as ours in London, Ontario. The ideal time to plant trees in general, is either in the spring and fall. Planting during these times allows trees to establish roots while the weather is mild and before the summer heat or winter cold sets in. During spring, the soil is warming up which helps in root growth, and in fall, the cool weather supports the settling of roots without the stress of hot weather. That being said, trees can be planted in the Summer as well, if planted during the warmer/drier part of the year they generally require extra care, extra watering and maintenance may be required to avoid dehydration.
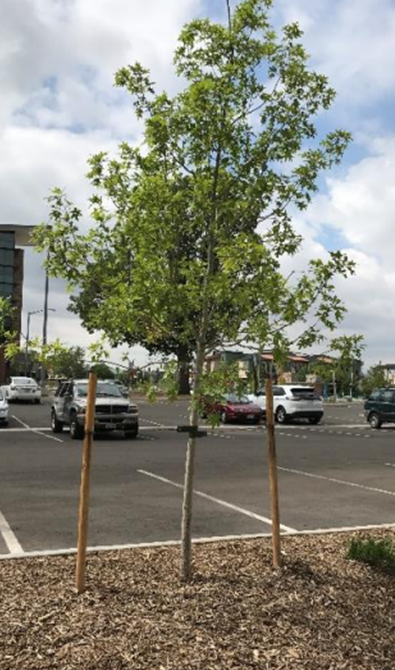
All newly planted trees do require a significant amount of care and consistent monitoring, over the first full year or two, until they are established.
IF YOU ARE PLANTING IN CLAY. . .
Planting a tree in heavy clay soil requires a bit more work. For best results, dig the hole about 12 to 16“ wider than the root ball. Really scruff up the sides and bottom of the hole to eliminate any smooth surfaces. Plant the tree so that the trunk flare is 2 to 4” above grade – this will allow water to drain away and prevent drowning. Back fill with the previous existing soil mixed with some peat moss and bone meal. The idea is to get the tree accustomed to its new soil–not to over amend the surrounding area.
Trees make our world beautiful and provide us with many obvious benefits – shade, privacy, increased property values, shelter and food for small animals, even a place for childhood tree houses. Besides these obvious benefits, trees also contribute to the health of our planet. They clean the air by giving off oxygen, storing carbon, and recycling moisture into the atmosphere. Trees help prevent soil erosion, help modify temperatures, and act as wind breaks
MAINTENANCE AND FINAL THOUGHTS ON NEWLY PLANTED TREES
Be sure to select the right variety of tree for your chosen location, (we can assist you with this At Baseline Nurseries), as well as provide optimal soil for the new tree. Maintenance for your newly planted tree is the biggest key to success. While large calliper trees can give you instant gratification in your landscape project, as they add height and bring your yard or garden to life immediately when planted, they do require more maintenance than smaller plant material generally speaking. Don’t make the mistake of planting your tree and walking away, assuming it will be able to fend for itself. It will require extra care until established, so be sure to check the soil moisture regularly, keeping in mind that overwatering can be just as damaging as underwatering to a newly planted tree. Proper planting and maintenance in the first year or two for your tree, are so very important, if you provide the care it needs early on, your tree will give you the shade and beauty you are looking for in your yard, for years to come.
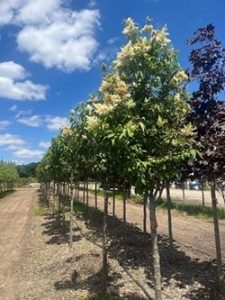
At Baseline Nurseries, we are proud to be your go-to destination for all things gardening. For over 50 years, our dedicated staff has been helping London and surrounding areas grow beautiful landscapes. We specialize in a wide range of native and ornamental trees, shrubs, perennials, and large caliper trees—everything you need to create your own outdoor masterpiece. Our knowledgeable team has a deep love for trees and gardening, and we take great care in nurturing plants from seedling to sapling and beyond.
In addition to clematis, you’ll find an extensive selection of garden favourites, fertilizers, grass seed, top dressing soil and everything necessary to create a lawn that’s the envy of your neighborhood. Whether you are an experienced gardener or just starting, we are here to guide you every step of the way.
So, why not stop by Baseline Nurseries for all your gardening needs? Let us help you cultivate the garden of your dreams. See you soon!

